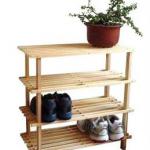
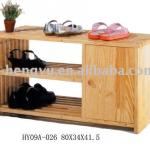
Wooden Shoe Rack - LA-WD010
| Type: Living Room Furniture | Specific Use: Shoe Rack | General Use: Home Furniture | Material: Wooden |
| Wood Style: Panel | Panel Type: Plywood | Appearance: Modern | Folded: Yes |
| Size: Customized size welcomed | Place of Origin: Guangdong China (Mainland) | Brand Name: LEDacrylic | Model Number: LA-WD010 |
| Name: Wooden Shoe Rack | Logo: Silkscreen,laser,sticker,etched,embossed or engraved | Design: Exclusive & luxurious style, can be customized | Advantage: High quality hardwood will not dent, turn yellow, or fade |
| Features: very smooth rounded edges for maximum bottle/label safety | Color: Flexiable(referring to PMS book) | Certificates: CE / EU, CIQ, EEC, FDA, LFGB, SGS | Shape: Customized |
| OEM&ODM: Acceptable | Style: Wooden Shoe Rack |
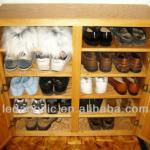
Materials:
- 3/4" x 4' x 8' Oak (or other hardwood) Plywood: Two Pieces for the Top/Bottom, two Side Panels, and the Shelves
- 3/4" x 1 1/2" x 12' Solid Oak Material: Two pieces for the Front Frame and the two, Door Panels
- 1/4" x 4' x 8' Oak Plywood: One piece for the Back Panel and Door Panels
- Kreg Screws; 1/4 lb.
- 3/4" Wood Screws; 1/4 lb.
- Six Hinges Hinges
- Plastic Legs
- Sandpaper
- Wood Filler and Glue
- Satin Finish Polyurethane Poly
Step 1: Cut the Box and Shelf Pieces - Determine the desired size of the Shoe Rack; this rack was designed to fit in a hallway against a 3' high knee wall (no space allowed for heavy winter boots).
- Select the 3/4" Plywood Panel; Rip two pieces to 14"; crosscut the Top, Bottom and two Side pieces per the dimensions listed above
- Select the Top, Bottom, and two Sides; make a 1/4" x 1/2" dado cut on the interior back edges of these panels to receive the Back Panel
- Select the Top, Bottom, and two Sides; drill Kreg holes on the panels as shown above to construct the box and to receive the Front Frame; Use the Kreg Pocket Hole Jig System
- Select the 3/4" Plywood Panel; Rip two pieces to 13 3/4"; crosscut them to four Shelves @ 34.5"
- Select the four Shelves; drill five Kreg holes on each of the bottom sides to connect them to the Front Frame and the Left/Right Sides
Step 2: Assemble the Box Pieces - Select the Top, Bottom, two Sides, and the four Shelves
- Select the two Sides and the Top Panels; attach the Sides to the Top Panel with Kreg screws (Note: allign the Front edges)
- Select four Shelves and cut two spacing blocks @ 5 3/4"; place the spacing blocks under the Top Panel along each side; using the Kreg screws, attach the first, Top Shelf (ensure the screws are on the bottom)
- Select the next Shelf; using the spacing blocks and Kreg screws, attach this shelf and the remaining two Shelves
- Select the Bottom Panel and Kreg it into place
Step 3: Make and Attach the Front Frame and Back Panel - Select the 3/4" x 1 1/2" x 12' Solid Oak Material and 1/4" Plywood
- Select the 3/4" x 1 1/2" x 12' Solid Oak Material, Crosscut the Front Frame pieces to the dimensions, as shown above
- Using the Kreg System, connect all Frame pieces, as shown above
- Select the Frame and attach it to the front of the Shoe Rack with Kreg screws in the previous drilled holes, as shown above
- Select the 1/4" Plywood; measure the Back Panel space; cut the plywood to size and attach it to the back side of the rack with short screws
Step 4: Make and Attach the Door Panels - Select the 3/4" x 1 1/2" x 12' Solid Oak Material and 1/4" Plywood
- Select the 3/4" x 1 1/2" oak; crosscut @ 45 degrees, the pieces for the two doors per the dimensions above
- Set the Table Saw to rip 1/4" depth x 1"; remove 1/4" x 1" material from the rear/inside edge to receive the 1/4" Plywood Door Panel
- Select the cut pieces of the Door Frames; connect the pieces using a Corner Jig, glue, and a 1 1/2" screw in each corner (pre-drill the screw holes)
- Select the 1/4" Plywood; cut the two Door Panels to the dimensions listed above
- Select the two Door Frames and two Plywood Panels; place a bead of glue along the perimeter of the dado of the Door Frames; set in the plywood panel; weight it down overnight to allow the glue to set
- Select the six Hinges and attach them, as shown above
Step 5: Finish the Shoe Rack - Select the 3/4" x 1 1/2" oak material and the Finishing Materials
- Select the Oak Material; cut two pieces @ 3/4" x 1/8" x 14"; glue a piece to each end of the Plywood Top Panel to finish the plywood ends
- Use the same 1/8" material and glue to finish the front edges of the four shelves
- Use Wood Filler for all holes
- Complete all sanding
- Apply a minimum of three coats of poly
We Promise:
1.GOOD FAITH.
2.HIGH QUALITY.
3.EXCELLENT SERVICES.
4.QUICKEST DELIVERY.
5.REASONABLE PRICE.
Please donnot heistate to contact us for further information!
| Packaging Detail:PE Bag+ Bubble package+ Inner box+Outer Carton |
| Delivery Detail:7-15days can follow customer's |


