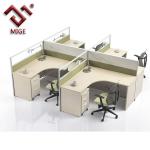
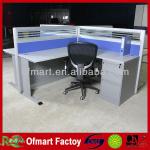
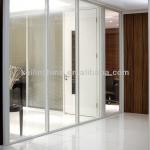
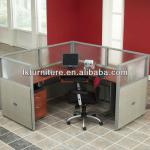
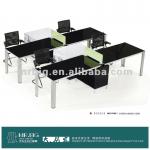
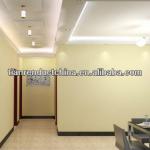
gypsum board full height partition - gypsum board
| Type: Office Furniture | General Use: Commercial Furniture | Place of Origin: Shandong China (Mainland) | Brand Name: PRANCE |
| Model Number: gypsum board | Ceiling Material: Gypsum board | Color: White/Multicolour | Size: 595x595;605x605;600x1200;1200x2400 |
| Thickness: 6mm-18mm | Acoustics: Sound Insulation | Unit Area Quanlity: <6.5kg/m2(7mm); <7.5kg/m2(8mm); <8.5kg/m2(9mm) | Load at break: 7.5mm≥110N; 8mm≥120N; 9mm≥140N |
| Fireproof Performance: B1 | RH: <90% | Standard: EN 13964:2007 |

PRANCEBUILDING MATERIAL CO.,LTDis a leading professional manufacturer of ceiling and drywall partition system in China, which has won a very high reputation within our client network after more than 16 years of effort and development:
PRANCEGypsum Board Drywall Introduction.
Your drywall can be virtually any shape, anywhere. Choose from a wide range of heavy-duty system options that provide code-compliant performance in both fire rated and non-fire rated applications with labor-saving advantages.
1.Gypsum Board Drywall Specification.
| Convenient Construction | The plaster board can be constructed easily by nailing ,cuting and planing,and thus it becomes the first choice among home decoration materials. |
| Raw material | The gypsum board is characterized for lightness and high intensity,dryness operation, green environmental protect, convenient construction and good processing quality. |
| Size | 595x595 |
| 605x605 | |
| 1200x2400 | |
| 1220x2440 | |
| Thickness | 7,7.5,8,9,9.5,10,12,12.5,13,15,15.9 |
| Surface treatment | Paper/PVC laminated/foil back |
| Production capacity | 10,000m2/day |
2.Gypsum Board of ceiling & wall partition system.
PRANCE System is a modern, non-load bearing and quickly assembled on site. The system consists of Gypsum Board screw fixed to lightweight galvanized metal sections and joint finished with drywall system is suitable for all internal applications for commercial and residential.
Exquisite, Modern and Adjustable
Durable and Standard Quality
Lightweight, Easy to Install and Economic
Applicable to Various Usages as Required
Office buildings requiring extra fine resistance, standard drywall system can provide a half-hour fire resistance. Other drywall Systems are also available to provide resistance up to 2 hours.
Other special properties such as heat insulation wall, high moisture resistant wall, acoustic wall, can also be provided by drywall system.
Although it's easy to figure how much drywall to buy (just compute the square footage of the walls and ceiling), it takes some planning to end up with as few joints as possible. The standard-size sheets for walls measure 4 X 8 feet. They are usually installed with the long side running from floor to ceiling, but if you can eliminate a joint by placing them horizontally, do so. All drywall sheets are 4 feet wide, but many building-material outlets offer 10-foot and even 12-foot lengths. The most popular thicknesses of drywall are 1/2 inch (walls) and 5/8 inch (ceilings), but check your local building code for requirements.
Step 1:Construct a pair of T-braces from 2 X 4s about an inch longer than the distance from floor to ceiling. Nail 2 X 4s about 3 feet long to one end of each longer 2 X 4 to form the Ts. Alternately, adjustable T-braces can be rented.
Step 2:Cut drywall panels to size. Use a sharp utility knife along a straightedge to cut drywall. After you make the cut through the face paper, place the board over a length of 2 X 4 laid flat on the floor, or some other type of support, and snap the scored section down. The gypsum core will break along the line you cut. Then turn the panel over, cut the paper on the other side, and smooth the rough edges with very coarse sandpaper on a sanding block.
Step 3:Install drywall panels on the ceiling. If possible, try to span the entire width with a single sheet of wallboard to reduce the number of joints. Position and wedge the T-braces against the drywall sheet to hold it in place until you finish nailing it.
Step 4:Drive nails at 6-inch intervals into all the joists covered by the sheet. Start in the center of the drywall panel and work out. Give each nail an extra hammer blow to dimple the surface slightly without breaking the face paper.
Step 5:When the ceiling is finished, cut and install wall panels. Carefully measure for any cutouts in the drywall, including electrical outlets, switches, or light fixtures. To make cutouts, draw a pattern of the cutout on the wallboard, drill a hole on the pattern line, and then use a keyhole saw to follow the pattern.
Step 6:Space the nails 6 inches apart along studs, but start nailing 4 inches from the ceiling. Butt the wall panels against the ceiling sheets. Dimple all nails. Nail metal outside cornerbeads to cover any outside corners.
Taping Drywall
The next step in installing drywall is covering the nails and joints, called taping.
Step 1:Use a 5-inch-wide drywall taping knife to spread joint compound into the slight recess created by the tapered edges of the drywall sheets. Smooth the compound until it is even with the rest of the board surface.
Step 2:Center the drywall tape over the joint and press it firmly into the compound. Because some compound will squeeze out, make sure that there is still a good bed underneath. When you get the tape embedded into the compound all along the joint, smooth it with the taping knife. At the same time, fill all the nail dimples with compound.
Step 3:When the compound is completely dry (usually 24 hours later) apply a very thin second coat of compound that extends out a few inches to either side of the first coat. After the second coat dries completely, apply a third coat, this time with a 10-inch-wide taping knife, extending the compound about 6 inches to either side. When the third coat is dry, feather all the edges with a sanding block covered with medium-grit sandpaper.
To tape inside corners, including the spots where the walls and ceiling meet, cut the tape to length and fold it in half. After laying the bed of compound, press the folded tape into the compound and feather the compound out at least 1 1/2 inches to each side. The corners require three coats, and the last coat should extend about 8 inches to each side. Sanding is required here, too.
To finish the outside corners, install a metal corner (from your building-supply store), then apply three coats of compound that taper up to the bead. The last coat should extend the compound on each wall to about eight inches wide. Sand as with other drywall joints.
Let the walls dry for up to five days, following the recommendations of the joint compound manufacturer. Give the surface of the drywall a coat of primer made for paint or wallpaper. When the primer is dry, sand the drywall surface lightly with fine-grit sandpaper on a sanding block. Be sure to sand between each additional coat of paint with fine-grit sandpaper. New drywall should receive at least three coats: a sealer, primer, and finish coat.
Quality: the main point we value a lot,CE & SGScan prove our attitude.
Service: we dedicate ourselves to offer you ourprompt service.
Responsibility: be responsible to you meansbeing responsible to ourselves.
Integrity:loyal to our products, loyal to our customers.
| Packaging Detail:Standard export packing. 1200x2400x9mm, 960pcs/20ft 1200x2400x12mm, 720pcs/20ft 1200x2400x12.5mm, 680pcs/20ft 1200x2400x15mm, 560pcs/20ft |
| Delivery Detail:15 days |


